MuVIT Tutorials
Below you will find tutorials on several subjects so you can get up and running quicker and without some of the more common issues. This isn’t complete yet as some things are still in a state of flux until after the AM, we hope to see you there.
Installing the software
The installation is pretty straight forward with perhaps one exception. Depending on what malware protection you use you may get the warning shown below from Windows Defender in Windows 10. Other malware products may have different warnings but they all have the same basic issue and similar solutions if they occur.
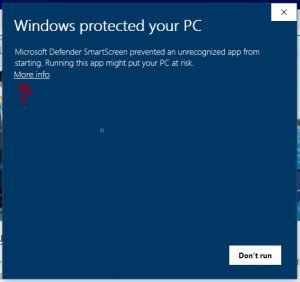
It is quite possible that the Windows malware protection will try to stop the installation from proceeding. This isn’t because the software contains a virus or other malware but rather because it isn’t signed by a certificate verifying the publisher. Click on the More Info link.
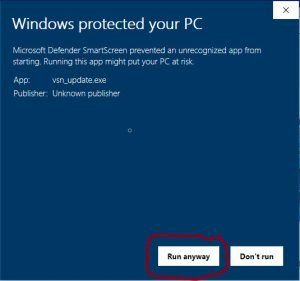
After you click on More Info the Run anyway button will be added to the selections. Click that and you can proceed with the installation. We recommend using the default options unless you have some specific need to do otherwise. The installation will then proceed as normal and should complete normally.
The majority of the settings are covered well in the online user manual but there are some MuVIT specific configuration items to be covered here.
Problems with DirectX
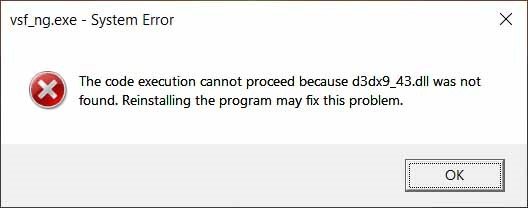
Some people have experienced issues with the DirectX graphics driver not being installed. If you get this error when starting Virtual Sailor, that is the likely culprit. The solution to this problem is to install the DirectX runtime. You can read about it in this blog post which includes the instructions to fix it.
VRInsight Console Tutorial
For this, we recommend the VRInsight tutorial as we are moving away from that console in favor of a more cost-effective model using a tablet and software for the buttons and 3D printed throttles which are covered below. If you are using the old VRInsight console, it will still work with the new software, you will just need to reassign the buttons.
Upgrading Virtual Sailor NG Tutorial
Keeping current with Virtual Sailor NG is pretty straightforward if you want to do it yourself. For those who want a more turnkey solution, we can offer support where we will provide the maintenance on a regular schedule.
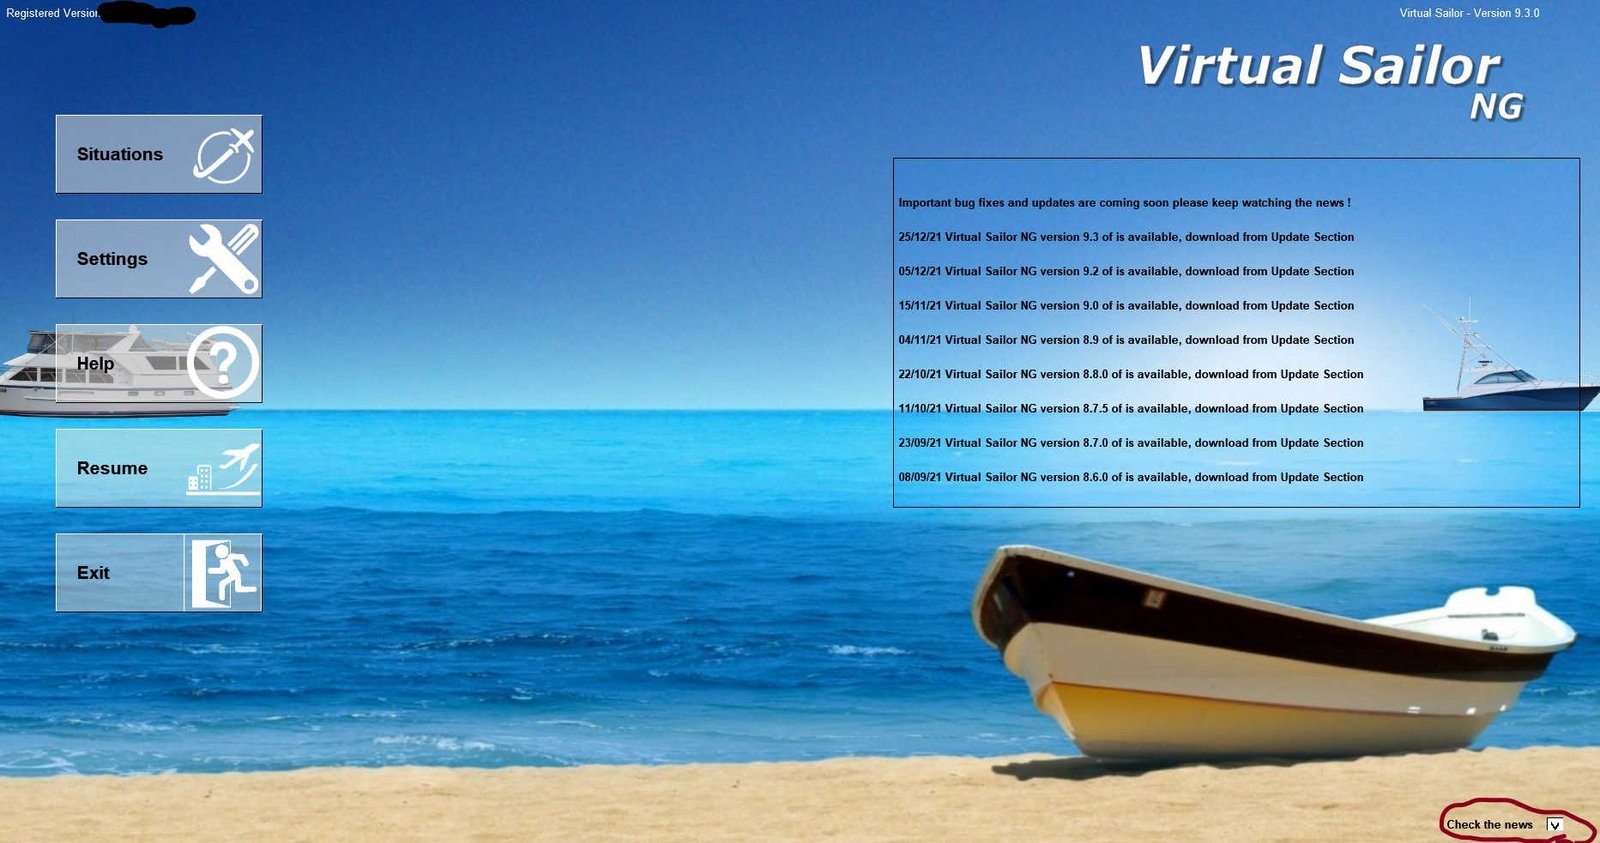
When you start Virtual Sailor NG you get a splash screen just like any other package and it has a few areas you should notice. The upper right of the screen has the version of the software you are currently running. Below that is a block that contains a feed of the last several news updates regarding the program. On the bottom right is a check box that allows you to turn off that news feed. Instead, we recommend just clicking it on occasionally to confirm if you need to upgrade. Clicking within the news block will take you to the Virtual Sailor Update Section where you can begin the update process.
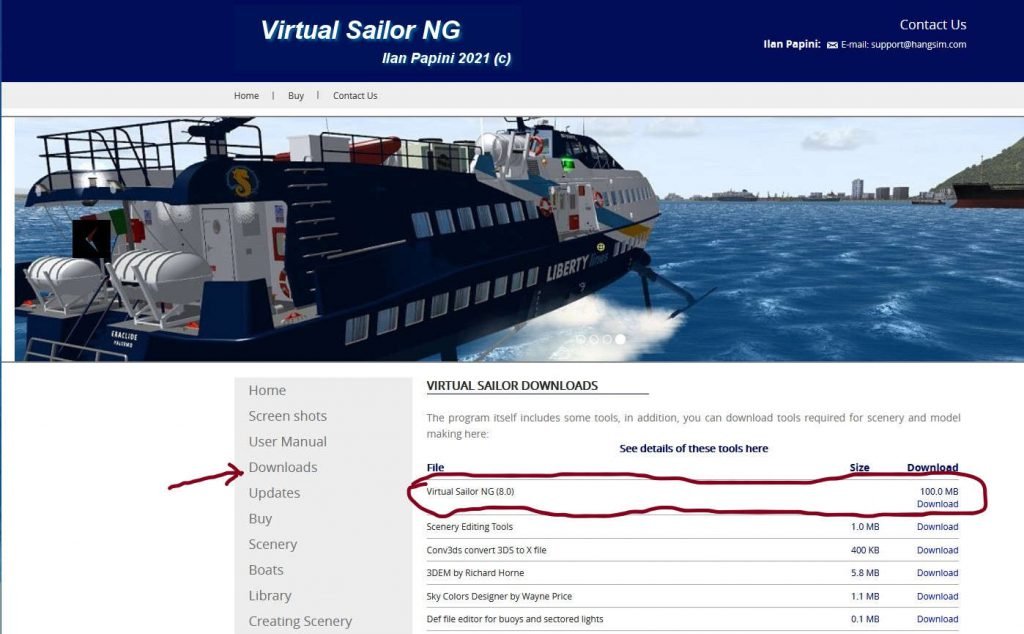
Once on the Virtual Sailor Updates Section, click on Downloads then click on Download under the Virtual Sailor NG section. This will download the update(s) to your PC for you to install. Where the installation files end up is a function of your browser settings and beyond the scope of this article, but typically the browser will tell you where it is putting the file(s). You should then select and run the file vsn_update.exe by double-clicking it or some browsers allow you to execute it from within the browser itself. Use whichever you prefer.
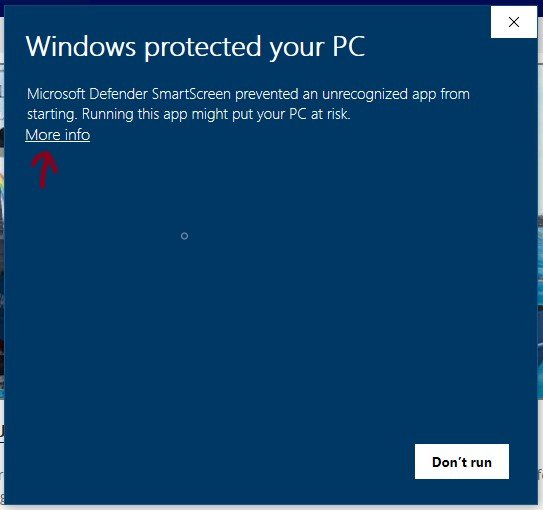
It is quite possible that the Windows malware protection will try to stop the installation from proceeding. This isn’t because the software contains a virus or other malware but rather because it isn’t signed by a certificate verifying the publisher. Click on the More Info link.
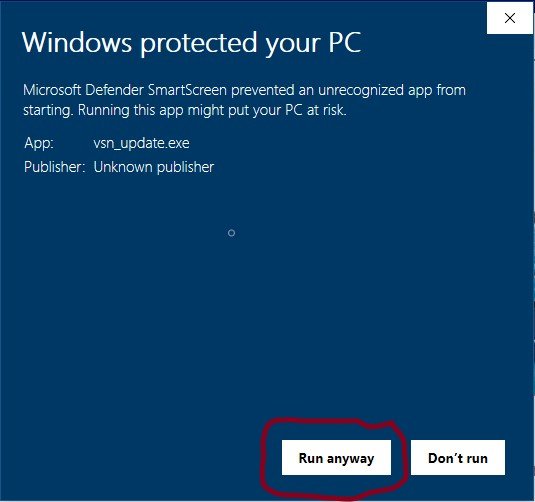
After you click on More Info the Run anyway button will be added to the selections. Click that and you can proceed with the install using the default options and the software will be updated within a short period. If you installed the software using non-default options initially you will have to modify the settings as appropriate but that is beyond the scope of this article.
Adding Vessels
Adding vessels is pretty straightforward forward particularly if you get the .exe version when they download. with the .exe files, you just save them to the Virtual Sailor directory (C:\Virtual Sailor is the default install directory) and run the .exe file by double-clicking on it and it should install the vessel in the correct location with no muss or fuss.
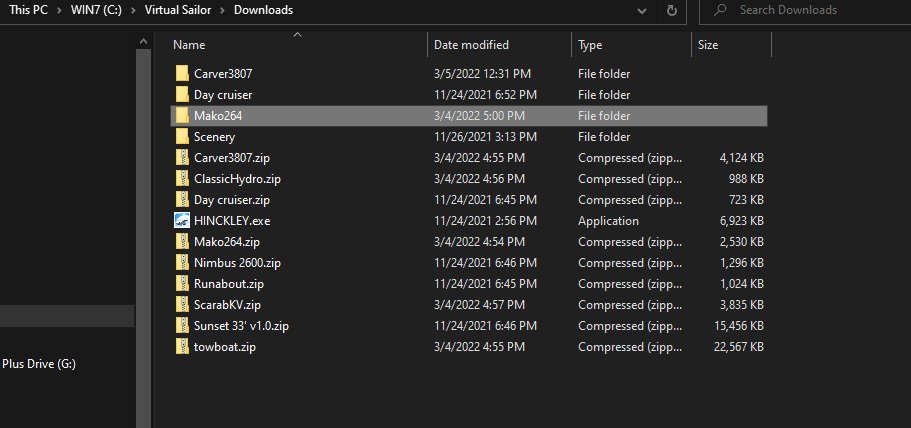
If you get the .zip files they can require a few extra steps which are covered below. For the purpose of this tutorial assume I created a downloads directory in my Virtual Sailor directory (C:\Virtual Sailor is the default install directory). I download the .zip file to that directory and unzip it in the downloads directory. In this case, we are working with the Mako 264 center console.
Once unzipped select the Mako264 directory and right-click and select copy. You will then paste that selection into the C:\Virtual Sailor\Vehicles directory in the usual way. This will create the directory C:\Virtual Sailor\Vehicles\Mako264
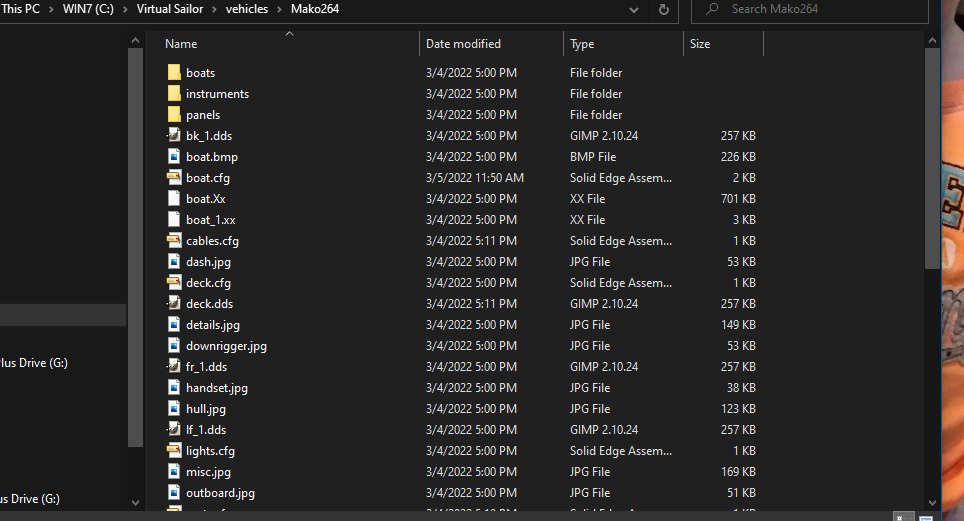
Having copied the Mako264 directory to the vehicles directory there is one more step that would seem counterintuitive but necessary. You need to go into the Mako264 directory and then into the boats\Mako264 directory and select all the files, right-click and copy them all.
You then go to the directory you created earlier C:\Virtual Sailor\Vehicles\Mako264 and paste all those files into that directory. Now you can start Virtual Sailor and your vessel should show up.
Tablet Usage Tutorial
The tablet interface uses a client/server configuration. The package is called Unified Remote and the server software which runs on Windows is free. Since this is a custom remote you, unfortunately, have to pay for the full app for the tablet/phone. The good news is it costs less than $5 for each device you will install it on, which would generally only be one device. There is a pretty fair amount of documentation on how to build your own remote but we did all that for you. You can take a look at our online store when it goes live after our Annual Meeting in February where we will list the configuration files we sell at very reasonable prices if you don’t want the hassle and just want to get going. The UR webpage has a tutorial on how to ‘roll your own’, or if you are in a hurry.
Whether you write your own or use one of our configurations connectivity is pretty straightforward. If your computer has Bluetooth you can simply connect and be done. Same with a USB connection. If you go the wireless network route, in general, you can just join the same network the computer is connected to and be ready to operate. As a general rule, I prefer to go the WiFi route as I find BlueTooth to be subject to more interference, and your mileage may vary Sometimes you can also use a USB cable to connect the tablet to the computer. In some situations where no wireless is available or the signal is weak, we have found that using an inexpensive wireless extender configured as a repeater works well. How to configure that is beyond the scope of this article since every device is different, but I will put together some recommended hardware and basic instructions shortly, one more thing to do…
Installing the Unified Remote server
Assuming you have chosen to build the tablet interface yourself or purchased just the tablet from us, the first thing you need in order to use the tablet interface is the Unified Remote server software available on their website. If you buy a turnkey package from our store when we open in February after the Annual Meeting this is already done for you. The server software is free and while they support a number of different systems the MuVIT platform is Windows based so you will want that package. They only support 64-bit systems but I haven’t seen a 32 in quite some time. So download it and move on to installing it if you are part of the DIY crowd.
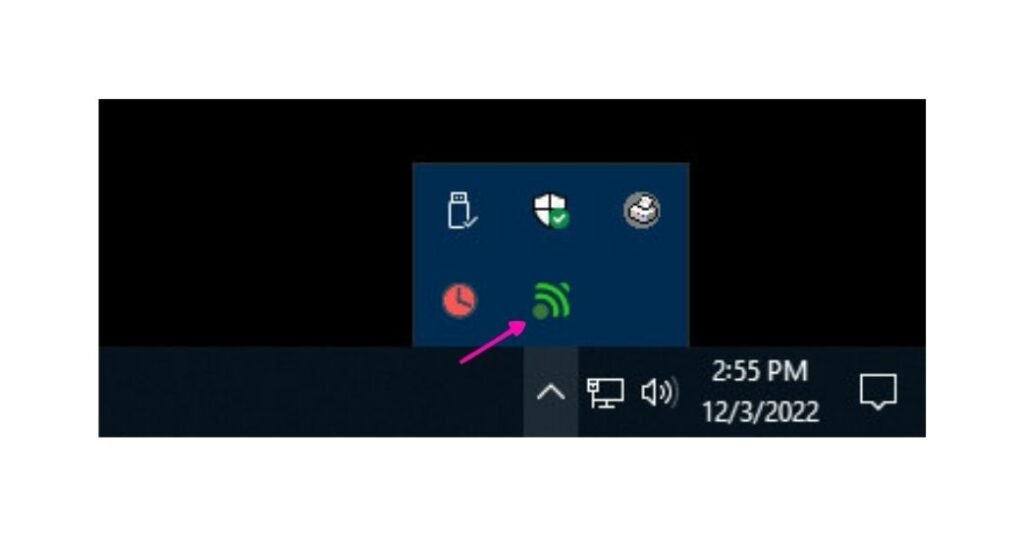
Installing is straightforward with the usual install wizard. A very basic tutorial is available. Once installed you can move on to the configuration.
Configuring the Unified Remote Server
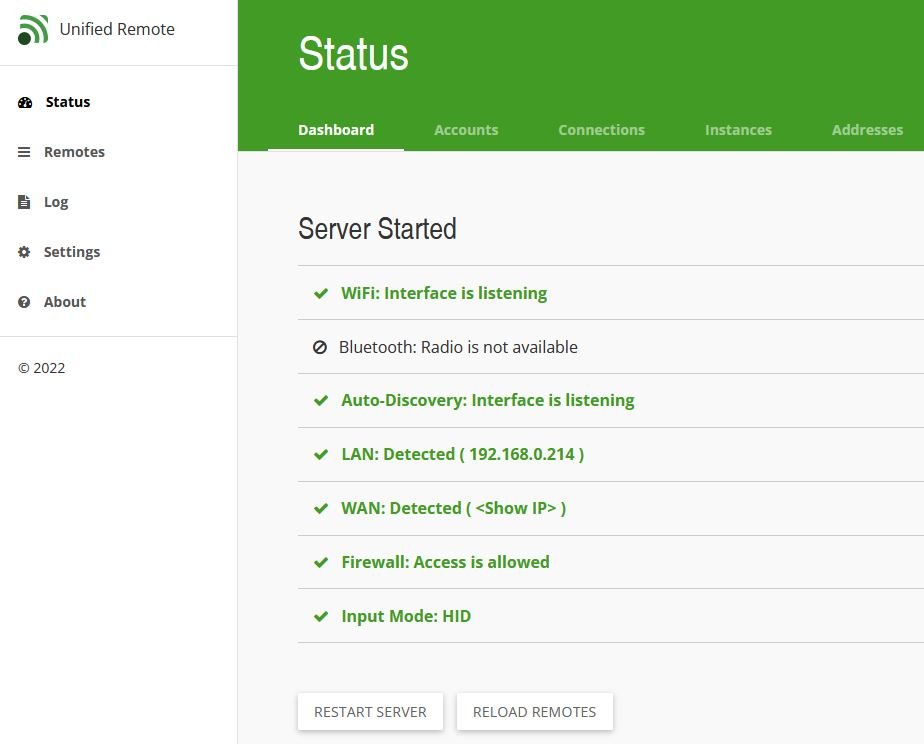
On the status page, you will see what the current status of the server is (go figure). It should look a lot like the picture although on this machine there is no BlueTooth device so it shows as not available. Instead, this computer uses WiFi for the interface to the tablet so that is listening. If you have a local network (LAN) available it should show as detected and if you have an internet connection the WAN should be green as shown. You can click on the <Show IP> to see the internet address if you need that. Firewall status should be allowed so the tablet and server can communicate. Input mode should be HID which means Human Interface Device.
The general settings are pretty basic and self-explanatory. You may or may not want to start the server whenever the computer starts. Since I use this computer for other things I don’t always start the server, if you only use your system for running the simulator you might want to have it start automatically. It doesn’t put much of a load on the system so having it start automatically isn’t usually going to be a problem.
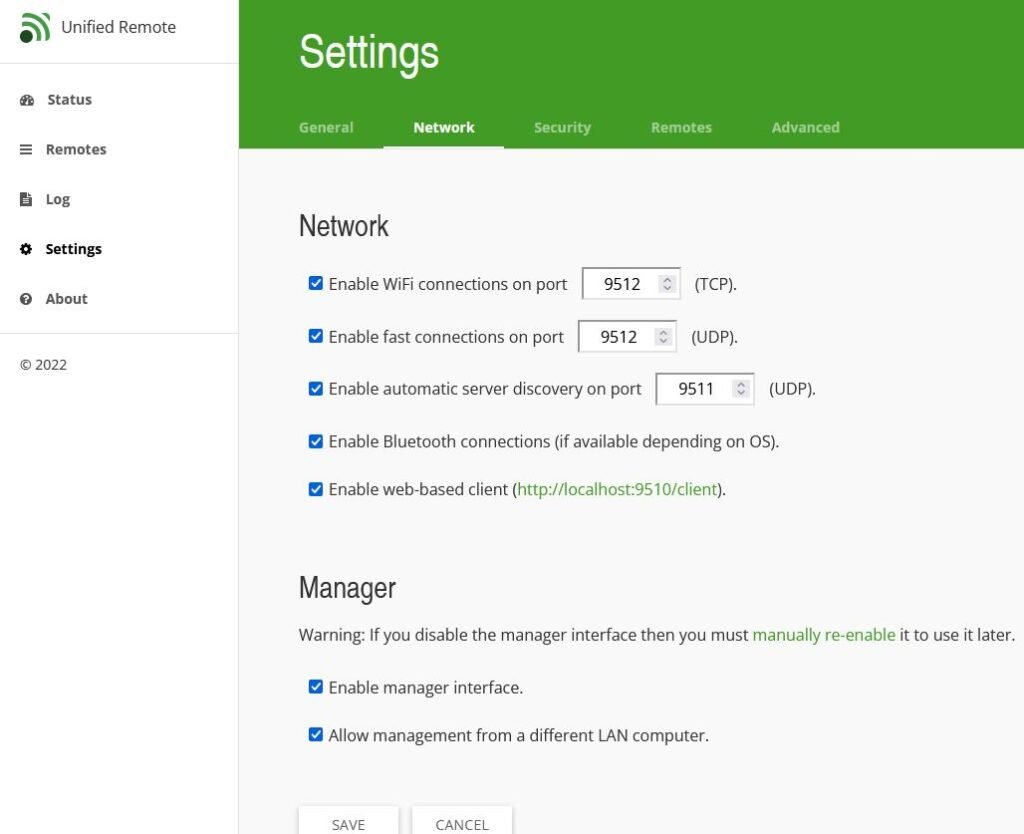
The network settings are where you can get into trouble if you don’t know what you are doing. You can generally leave these at their default settings unless you have multiple system running in the same area, then you could run into conflicts. In that case you would probably want to assign each platform their own port number out of an abundance of caution.
The security settings are pretty basic but sufficient for the cause. You can set passwords for establishing connections with the tablets if you want. You can also encrypt the communications if you wish but that does add some overhead to the whole system. I use a simple test, am I trying to control something like a boating simulator or something mission-critical like the space shuttle? Adjust as you see fit..
The Remotes settings are pretty basic but critical, get them wrong and you’ll go crazy trying to figure out why the tablet interface isn’t loading properly, BTDT. In short, this page just tells the server where to look for the tablets remote configuration (e.g. this is where you would find the MuVIT remote configuration for the buttons, etc.). Additionally, the check box tells it to always check if the tablet configuration has been updated. That could be handy if we have to send you an updated or modified configuration file.
Building the individual config files for remotes is beyond the scope of this article but there is ample documentation available and sample code for those so inclined.
The Remotes configuration page shouldn’t be confused with the remotes settings page. This page lists all the remote configurations in the directory which can be quite a few. The sample shown just has the MuVIT tablet shown but the list is actually well over 100. Fortunately, they are in alphabetical order which helps a lot when you are looking for the one that you made. Of course, if you can’t remember what you named it can be rather time-consuming to find the right one. We suggest disabling and deleting any unused configurations to make it easier to find what you want to use as any enabled ones will show up on the tablet as a choice you can make. Again, we can help make this all simpler, just drop by the store where we will be selling tablet plug-and-play configuration files if you already have a tablet, or contact us for help.
Settings Tutorial
Throttles
If you are using the VRInsight console we recommend this tutorial to assist in configuring the throttles.
The MuVIT throttles we produce are 3D printed and assembled by us, so there is a lead time to do all that. The controls come calibrated but recalibrating is as simple as setting the throttle to its center detent when starting the computer. Finding neutral is easy as at the center of travel there is a detent which you can feel as you move the throttle through its range. The housing contains a controller board with onboard software which communicates to the PC via a USB cable, in the future we may make a Bluetooth version if there is enough interest. The only trick with these is getting the settings correct in the simulator, this blog post briefly explains the caveat of making sure everything is connected prior to booting the computer. Although this post is directed at the VRInsight console, we have found it seems to apply pretty consistently to all attached devices where Virtual Sailor NG is concerned.
Our throttles are still in beta testing but will be available shortly in the store, at which time this tutorial will be updated as necessary.


